Tuesday, July 28, 2015

Lighting problems

I read a lot about the lights.  I think the wires are fine.  I think the problem is a combination of poor connections and broken light fixtures.  

This is a weird one, the back running light.  It seems the light wire and the ground latch to a metal grabber on the fixture to complete the circuit.   I think these look good and the wiring and connections are fine.  I'm going to just try cleaning it all up and new bulbs.
This is the inside of the back break and turn signal. It's missing one bulb and wire completely.  I will buy a new break and turn signal to install on this plate, under the original red lens. 


Here are the BEAUTIFUL connections behind the brake plate.  :)  It seems the burned, twisted, exposed connections are probably the big problem! :) 


Vent Repair

We got  it repaired.  It needed a new pull switch and the cracks repaired.  I also reinforced the back bar because it was brittle and I didn't want it to break.  My  hubby helped get the wiring back together. 

This was the before.  I cleaned, sanded, repaired and painted it.  

Saturday, July 25, 2015

First trip out with the apache!

We just went 20 miles to a small lake.
 The van hauled it well, although I think we'll look into trailer brakes for longer trips.  We figured it's 2040 pounds loaded.  It's nice to have a grain bin (for corn and soy) in town so that we can use the scales.
 Our view:
 so excited!
 The little trailer amongst the HUGE rigs.
 Ready for bed
 Game time!  Our feet were nice and cold (the AC is under the table!

Indoor lock for Apache

The existing door lock is flimsy at best.  I looked at all the hardware stores and couldn't find something I thought would work.  I was scrubbing the aluminium and realized we could use a little metal in the track to lock it more securely:
 My husband put on a coat hook we had and I painted the whole thing silver to make it blend in better.  It's just a piece of 1x1 we made a little narrower.

Interior before and afters

The interior is finished!

Light green kitchen, silver handles.  I did get a new black dorm fridge!


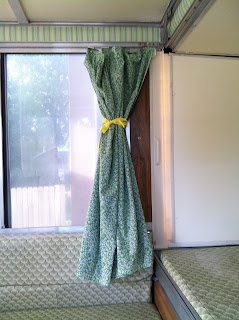
 Curtains came out nicely.  They are very cheerful!
 After 2 coats primer and 2 coats semigloss latex paint.

 The far benches didn't have cushions- that will be next!


Saturday, July 18, 2015

The windows are back in!

The baby was so glad to see the cushions.  He's trying out his new bed!
 The new look- one more coat of paint needed.
 New curtains, yellow walls, green cabinets and white bench seats.  
 I really like the new stripes by the ceilings.  

I think I've put in 80 hours of work, I hope we all love to camp in it.  

Tuesday, July 14, 2015

Painting continued... an idea make my own telescopic cover.

This is coat 3, I finished coat 4 this morning.  Correction- It takes about 2.5 hours to do the whole painting process per coat.  I think with the 5th coat, I may have good coverage, I hope! 
 Spending this much time in my carport made me notice this flashing.  I think I could make telescopic covers with a 8.5 inch x 45 inch piece of flashing. It would cost about $15 for all.

I would need it folded in a "Z" shape. This seemed like a method I could use to  bend it:  
http://www.finehomebuilding.com/how-to/video/plywood-sheet-metal-brake.aspx

I think I could spray paint it shell white and cover the edge with the ABS/MEK goo so that it wouldn't be too sharp to handle.I was looking for a plastidip, but can't find one in white.


Sunday, July 12, 2015

$50 Paint job on my pop up Apache RV

I read and read about how to paint my Royal.  I don't have a lot of money to spend or a garage to paint in.  I have a carport with our cars and the neighbors cars.  
I came across the $50 painting method.  
It requires a firm 4-6 inch white roller ($2), a foam brush (.50c) and Gloss Rustoleum ($7) paint, mineral spirits ($4,) a tack cloth ($2,) and 600-1200 grit wet sandpaper ($10!)  

Google $50 paint job to read gobs about it.  Basically you prep really good by sanding, priming, sanding, washing, wipe with mineral spirts, a tack cloth.  Then you do 1 cup paint and 3/4 mineral spirit.  You roll on in the thinnest coats possible and let it dry 5-6 hours.  Then wet sand, wash, wipe with mineral spirits and tack cloth and then do it again.  

This is coat one- it was nearly dark when I finished.
 It looks terrible because it doesn't cover green with the first coat, but it is smooth.
 We have a heat advisory today so I woke up early to get sanded, washed and wiped to put on the second coat.  The 600 grit smoothed it all out like glass.  
The coverage is much better with 2 coats:
 Close up of doors-
 I think after 5-6 coats, it should look great.  
It takes 90 minutes to sand, wash, wipe and paint.  Not too difficult.  

Removing 35 year old decals- cheap way...

I preface this with the fact that I don't know what I'm doing....  I made this up because I like to do things with materials I have on hand.  So I gave this a shot and it worked.  I removed the decals from my Apache pop up.    I also intended to paint it so paint damage was not a concern for me.

My materials- natural bristle brush, MEK substitute and MEK and a flat razor scraper.  On the first side I tried heat- didn't work. 
Then I used a little of the MEK and a lot of scraping.  This resulted in many deep scratches and it hurt my hand.  

This is the better way-
 These decals are cracked and baked on- the grey is part of the decal.  First apply MEK with brush, being careful to not to let it drip (it will remove paint.)
 then very carefully scrape.  I had to be careful not to scrub or scrape to hard, it just scratches the surrounding paint.
Lightly scraping allows the MEK to break up the sticker.
  Brush on another layer of MEK as soon as it stops breaking down the sticker.
Keep scraping and
 Scraping and 
 Scraping and 
 Scraping and 
 Scraping until all the decal and adhesive is gone.  
It took less than two hours to get it all off.  

Wallpaper for my Apache pop up RV--contact paper

I really don't like this plastic gold strip.  I saw another person cover it with contact paper so I gave it a shot.  I really like it.
I got a good system for putting it on so I thought I'd share.  The key is overlapping onto the metal and smoothing with this spatula.  

 I ran my finger nail along the metal ledge several times and then very gently trimmed the contact paper with a razor.
 It peels right off. 

Thursday, July 9, 2015


I decided that I didn't sand enough...
 It must have been parked by a tree because there were lots of deep scratches here.  I took them all off.
 My helper!  He loves water and so he washed and washed!
Primer done.  It turned out great.  No scratches showing through.
 Looking down-

 Looking parallel- I'm really pleased with my work.  I'm sure a body shop guy would find fault, but I'm impressed! :)
I'm waiting for sand paper in the mail.  So I moved work inside.  There was tons of water damage here, too much to salvage.  So I took a straight edge and cut out the worst offending part.   It was split out rotted and hanging down.  


 I saw this on pintrest- contact paper to cover  the gold, stained, bubbly plastic around the top.  It's just the right colors and really added a lot of appeal to the inside for $12.
I finished priming 3/5 ceiling panels.  I'm waiting to repair the vent before doing those water stained ones.  
Good Night all...